
I’ve been having so much fun making improv blocks that I thought I’d share with you a tutorial on the process I use. I’ll show you how I take the traditional log cabin block and make it modern with improvisational techniques.

Unlike traditional quilting where you have a pattern in mind and know what the quilt will look like before you begin, with improv, the quilt develops as you sew and trust your gut.
And for all of you trying to get a handle on your scraps, this is a great technique to use those odd shaped scraps that you just can’t bear to throw away.
What you’ll need:
A willingness to let go – If you’ve always sewn precisely measured and cut pieces, you’re in for a treat! With improv, you let go of the need to be perfect because the measurements of each individual piece of the block don’t matter.
Fabric – It’s difficult to say how much fabric you will need. It depends on how wide you make your logs, the size of the blocks you want, and the size of the quilt. I used 12 different fabrics in the block featured in this tutorial. You certainly don’t need to use that many, but the more different fabrics you use, the more visually interesting the block.
Let’s talk prints versus solids. I like to use solids or prints that read like solids so that I get sharp contrasts between the shapes. Using colors from a range of values – lights, mediums, and darks – will also maximize the contrast and the impact of the shapes you create. To learn more about value, click here. You can certainly use prints, but pay attention to value to get the most contrast in your block. This way, you’ll actually be able to see the incredible shapes your improv piecing will create.
Seams – I’ve used a quarter-inch seam allowance and pressed the seams open after adding each log.
Cutting the fabric:
You can use scraps or cut your fabric into strips. Vary the width of your strips from 1″ to 3″ or more. I wouldn’t suggest going any smaller than 1″ in width because strips that are smaller than 1″ wide will result in seam allowances that overlap, which may create bulk in your block.
Notice in this picture that the strips vary in width. I didn’t even use a ruler to cut them.

Making the blocks:
1. Sew together two pieces of fabric to start your log cabin. Try not to obsess about which two to start with. Focus on making a contrast. Here I chose to start with a dark blue and a light blue.
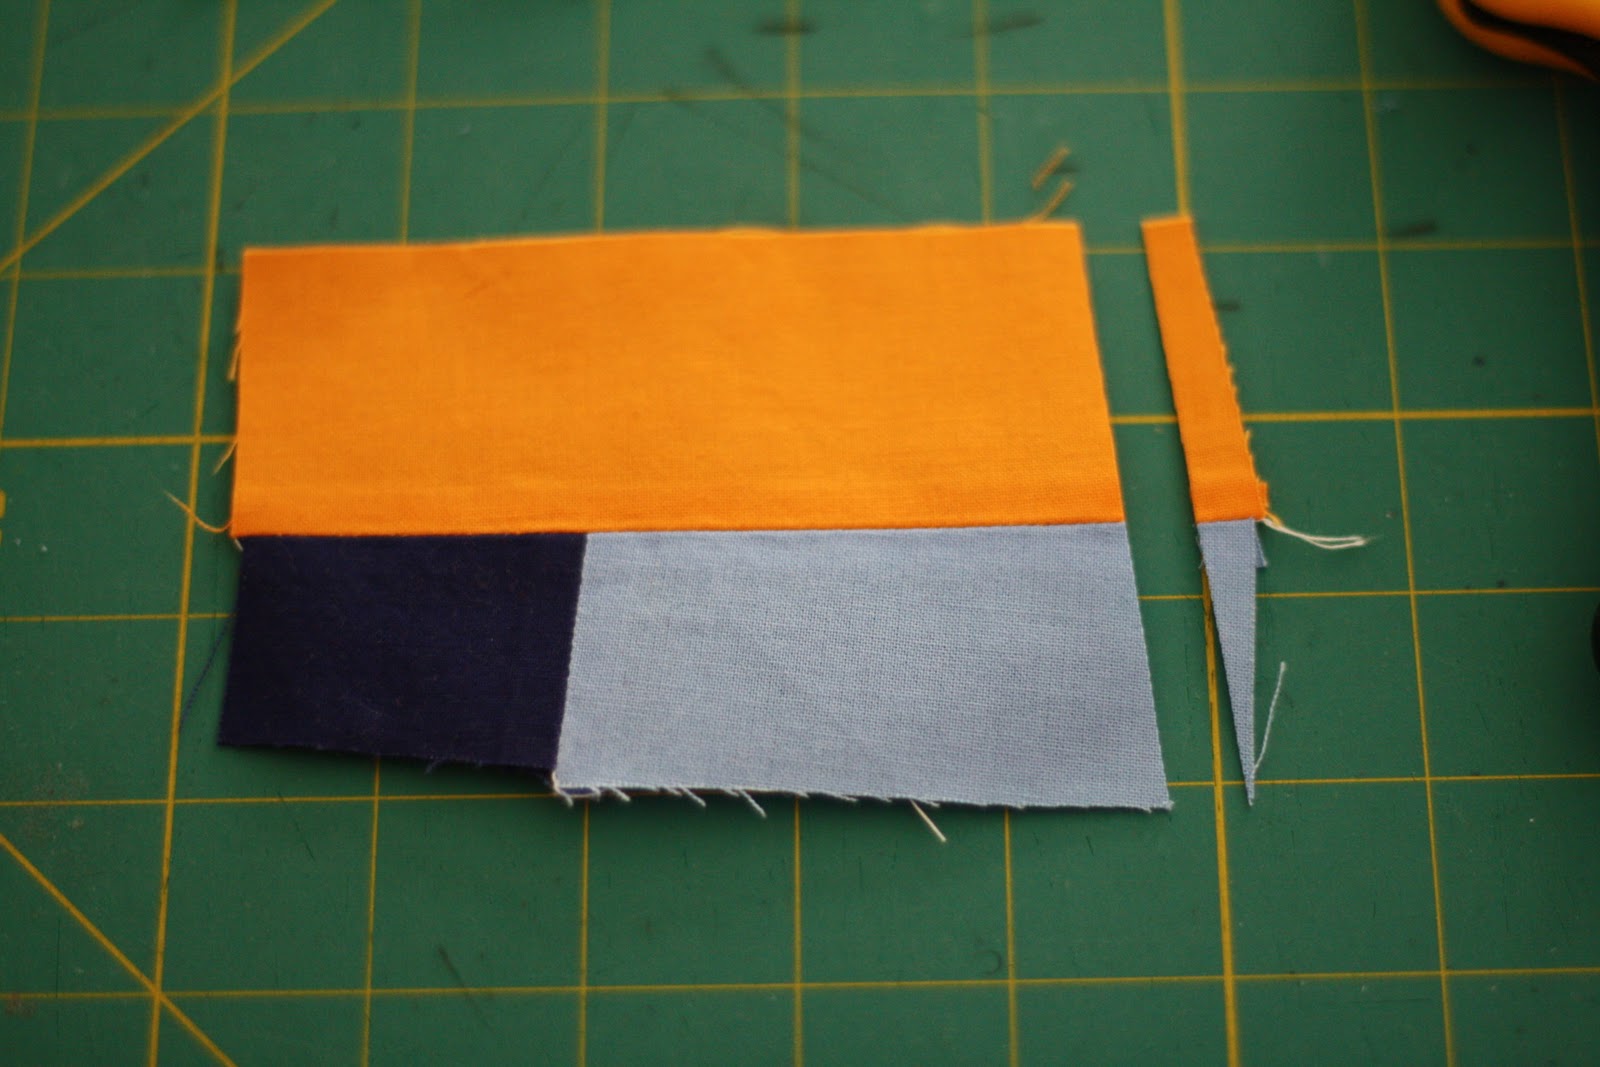
After you sew the pieces together, trim. I like to use a ruler to get a nice straight edge to sew the next log on. I also use the ruler so that I trim off as little as possible so I don’t waste too much fabric.

Notice that I trim on an angle. This gives the block its wonky look and adds visual interest.
2. Add another log and trim. It doesn’t really matter which side of the block you add the next log to. I tend to add the next log to the side that I just trimmed, but it’s up to you which side you choose.
3. Repeat step 2 until your block is big enough to trim it into a square (or any other shape that you want) at the size you want.
In general, you’ll want to keep adding logs until the block is about an inch bigger than the size you want to use. You may have to make the block bigger depending on its shape.
I’ve included photos to show you how the block grew with each additional log and where I trimmed.


4. Using a clear acrylic ruler, place the ruler over the block and check to see that the block is a bit larger than the unfinished cut size you want.
Keep in mind that you’ll want to keep an extra 1/2″ for the seam allowance for when you get ready to sew your blocks together. For example, I wanted my block to be an 8″ finished square. I kept adding logs until the block was about 9″. I then trimmed the block down to an 8.5″ unfinished square.
Since it’s improv, you can cut your block into any shape you want. Try rectangles or even triangles!
Here’s the final block!
Please let me know if you have any questions or if anything is unclear.
If you make this block, please upload it to the Mama Love Quilts flickr group. I’d love to see what you stitch up!
Happy Improving!

17 comments
It's just gorgeous and I love that you used all solids, too! I'm pinning this! 🙂
Great tutorial – your photos look great!
Thank you. I try to be more flexible when I start a project and always end up being "uptight and perfectionist" about my blocks. I would like to try this. I love the modern look.
Thank you for this – I have a bit of trouble letting go to do wonky piecing!!
Wonderful. Cannot wait to try it.
I was looking for this tutorial for a long time! Tks
I just love what you have designed in this block. I can't wait to try my own color scheme.
Thank you for your creative mind and sharing it with the rest of us.
Excellent, Thanks for sharing these ideas to make own Log Cabinsquilt. This is certainly a great activity for craft lovers. I thoroughly enjoyed doing it. Thanks again keep posting.
Excellent, Thanks for sharing these ideas to make own Log Cabinsquilt. This is certainly a great activity for craft lovers. I thoroughly enjoyed doing it. Thanks again keep posting.
Haven't tried a Wonky block before (seen a lot) but you make it so full of fun I can't go any further! I must try it this weekend (have some time on hand) :)! Thanks Kisha, I came across your video on Go Tell It At The Quilt Show (gorgeous and colorful quilt)…
Beautiful block. Glad I found your blog and I am looking forward to seeing what you come up with next.
WOW, I love this block! Thanks for the tutorial, very clear!
Greetings from Spain
This is just like some of the quilts from Gee's Bend. Thank you for the tutorial.
I love this and I can not wait to try it!
Thanks! Go for it!
Wonderful. How did you assemble blocks? I am thinking of either white or black , or maybe a very modern black on white geometric pattern to border them. Would love your thoughts
Thanks, Mart! I’m not sure I understand the question about how I assembled the blocks. Using black and white would make a great contrast!
Comments are closed.